Step-By-Step Proper Golf Grip Guide: What You Need to Know
Posted by
When it comes to learning how to swing a golf club, one overlooked aspect is the golf grip. Amateur players often focus on things like their feet, ball position, and other aspects of the swing. And while these components are certainly important, they may not be relevant if you don’t have a proper grip.
Additionally, the golf grip is unique. It tends to be different than the grip you’d use to swing a baseball bat, for example. However, we often see new and amateur golfers using a traditional baseball-style grip because it’s such a familiar style. Though this grip may work for some, it can have a considerable impact on your golf game.
That’s why we’ve put together this step-by-step proper golf grip guide. We’ll start by covering some golf grip basics and touch on why the grip is so important. Then, we’ll jump right into the step-by-step guide. We’ll follow that up with minor adjustments you can make to improve your grip. By the end of this article, you should have a much better idea of the changes you need to implement to your grip to improve your golf swing.
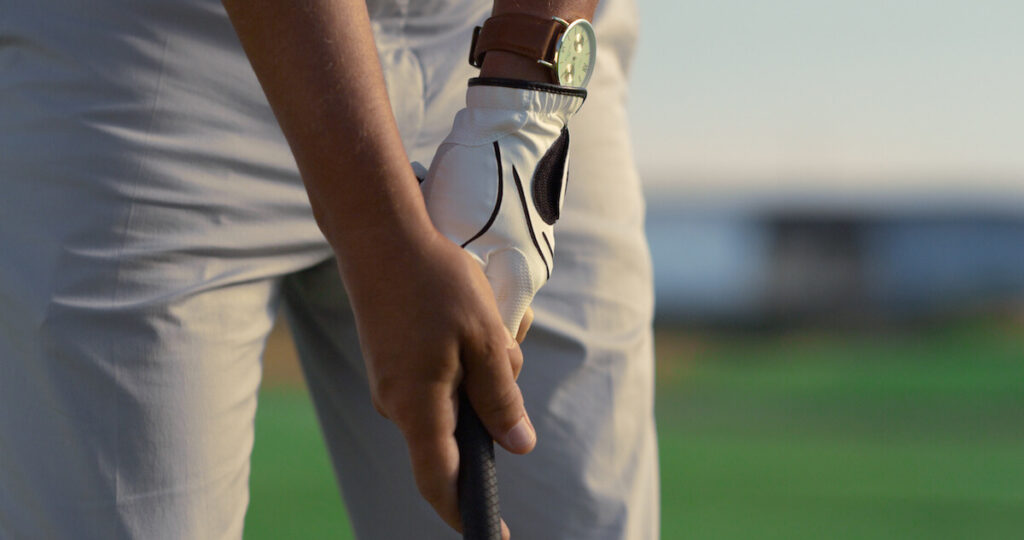
Golf Grips — The Basics and Their Importance
The golf grip is how you hold the golf club. When browsing online or watching PGA pros, you’ll find that there are various types of golf grips. The three most common types of grips include the following:
- Overlapping Grip
- Interlocking Grip
- Ten-Finger Grip
If you work with a golf coach to improve your swing, your coach will likely evaluate your grip and help you come up with the option that works best for your game. There is no one-size-fits-all option, as different grips work for different people.
However, that’s not to say that having a proper grip is not important. An improper grip could impact your wrist hinge on your backswing. A proper grip allows a fluid wrist hinge, which can generate more club speed on your downswing.
A proper grip also increases the likelihood that you keep the clubface square at impact. This, in turn, will allow you to hit more consistent golf shots.
Now that you understand why the golf grip is so important, let’s get into our proper golf grip guide.
A Step-by-Step Proper Golf Grip Guide
Our step-by-step proper golf grip guide will cover all three of the grip options mentioned above. Remember, the perfect golf grip is the one that fits your game and your swing. Your golf coach will be able to help you determine which grip is right for you.
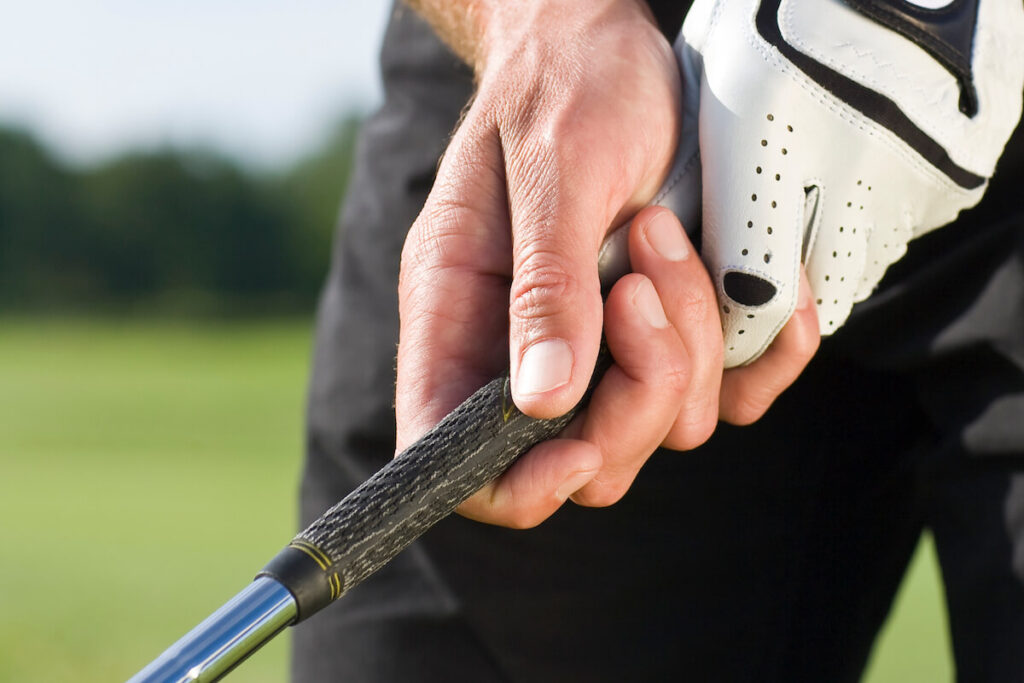
Overlapping Grip
The overlapping grip, also referred to as the Vardon grip, is ideal for those with larger hands. For a right-handed golfer, the pinky finger on your right hand goes overtop of the middle finger and the index finger on your left hand. This would be the opposite for left-handed players. Many golfers find this comfortable, and it affords them more control over their grip pressure.
A Step-By-Step Guide to the Overlapping Grip:
- Right-handed golfers, place your left hand on the club first, near the top of the shaft. . Left-handed golfers, place your right hand first. Then, put your other hand on the club.
- Wrap your fingers around the grip. You should not be gripping tightly or too loosely. Think of it like an egg that you don’t want to drop. The grip of the club should now be between your fingertips and the pad of your hand beneath your left thumb and right thumb.
- Lift your right pinky finger and place it on top of the middle finger and index finger of your left hand (or vice versa for left-handed golfers).
- Check to ensure there is about an inch or two between your top hand and the end of the club.
Now that we’ve covered the overlapping grip, let’s look at the interlocking grip.
Interlocking Grip
The interlocking grip calls for right-handed players to put their right pinky between the middle finger and index finger of their left hand. It is similar to the overlapping grip, except for the fact that the fingers intertwine with one another.
The interlocking grip may feel funny initially. However, it forces both your lead hand and trail hand to work in unison with one another, giving you a solid foundation for your golf swing path. Perhaps that is why it’s the preferred grip of Tiger Woods.
A Step-By-Step Guide to the Interlocking Grip:
- Repeat steps 1 and 2 of the overlapping grip, putting your hands around the grip. Start with your non-dominant hand and make sure your grip is not too tight or too loose.
- Slide your left hand onto the grip. Then, separate your right pinky finger and your left index finger, and hook them together. Rest your hands back on the grip.
- Check to ensure there is about an inch or two between your top hand and the end of the club.
As mentioned, this grip may feel funny at first, so it may take a few practice swings for you to get used to it.
Ten-Finger Grip
The ten-finger grip is also known as the baseball grip. With this grip, your fingers do not overlap or interlock. All ten fingers are on the club. This grip tends to be comfortable for amateur golfers, especially as they are learning golf. While this may work for some, it can often lead to a drastic slice or hook because the power is not distributed evenly through the wrists. This could cause you to miss fairways and could ultimately make the difference in you playing great golf.
To perform a ten-finger grip, put both hands on the club. Your hands should be touching with the base of the pinky finger on your bottom hand resting against the index finger of your top hand. This grip should feel natural and comfortable.
Other Grip Alterations
In addition to the three basic hand grips mentioned above, there are a few variations you can implement into your grip that are worth mentioning. These are commonly referred to as strong grips, neutral grips, and weak grips.
The grips outlined above are all based on having a neutral golf grip. When you grip the club, you should be able to trace V-shapes within your thumbs. When you have a neutral grip, both of these V’s should point toward the middle of your face.
If you have a strong grip, your top hand rotates a bit more so that this V shape is more in line with the right side of your head (for right-handed golfers; the opposite is true for lefties). If you have a weak grip, the V-shape aligns with the left side of your head. .
Amateur golfers may want to experiment with different grip alterations and hand positions to determine the impact it has on their ball flight. A trusted golf coach can also help you determine which grip is best for your game and provide you with a few training tips to help you make improvements.
Focus on Your Grip to Improve the Fundamentals of Your Swing

When it comes to the golf swing, the grip is one component that all players — from beginners to amateurs — tend to overlook. Your grip serves as the starting point for your swing. An improper golf grip can result in a poor wrist hinge or prevent you from keeping the clubface square, leading to inconsistent impact with the golf ball.
Learning how to grip a golf club may be uncomfortable at first, but it could lead to drastic swing improvements, ultimately improving your game and lowering your handicap. Following our step-by-step proper golf grip guide can help. When it comes to golf grips, there are three main options that you can pick from: an overlapping grip, an interlocking grip, and a ten-finger grip.
If you’re looking for more help with your golf grip — or any component of your game — be sure to check out Skillest. With Skillest, you get access to virtual coaches who can watch live sessions or pre-recorded videos and then provide feedback. It’s an easy, convenient way to gain access to expert golf coaches, no matter where you live. Be sure to check out a list of our available coaches today.